Showing posts with label dessert. Show all posts

Sunday, April 8, 2012

Bird's Nest Banana Cupcakes with Chocolate Buttercream Frosting


Oh, hello again friends. If you celebrate Easter, what did you do today? Spend time with family? Enjoy the sunshine? Eat good food? Spend time in the sunshine with your amazing family while eating good food? That's what I did.

I also started the day off with obscene amounts of matzo brei because, hey, I have one parent who is Jewish and one who is Catholic and my taste buds don't discriminate. I swear I'm not eating again until Thanksgiving.

yummm

You know what else I did today? Spend absurd amounts of time playing Draw Something.

I had been under the impression that Words with Friends and Draw Something only worked on Iphones. False.  I mean, this is just way too much fun. Seriously. Too. Much. Fun. This article was never more timely.

Anywho, I did take some time off from finding creative ways to draw (among other things) a cyclops, a tomato, an apron, and vomit to share these Bird's Nest cupcakes with my family. The banana cupcake recipe is from Baked, while the buttercream and topping situation is courtesy of yours truly. These guys take a little while to prepare if you are doing everything from scratch but you can try to shorten the time needed by buying premade icing and pre-toasted coconut.

I must say, the cupcake recipe was fantastic, and the finished product is adorable. I will definitely be making these again.


Bird's Nest Banana Cupcakes with Chocolate Buttercream Frosting

Ingredients:
  • 2¾ cups all-purpose flour
  • 1¼ teaspoons baking powder
  • 1 teaspoon baking soda
  • ½ teaspoon salt
  • ½ cup (4 ounces) unsalted butter, at room temperature
  • ¼ cup vegetable shortening, at room temperature
  • 1¾ cups granulated sugar
  • 2 teaspoons vanilla extract
  • 2 eggs
  • 1½ cups mashed very ripe bananas (about 4 bananas)
  • ½ cup buttermilk
  • 1 batch of chocolate buttercream frosting (see below)
  • 1 bag of shredded coconut
  • 1 bag of candy eggs
Preheat the oven to 325 degrees. Line two 12-cup cupcake pans with paper liners.

Sift together the flour, baking powder, baking soda, and salt and set aside.
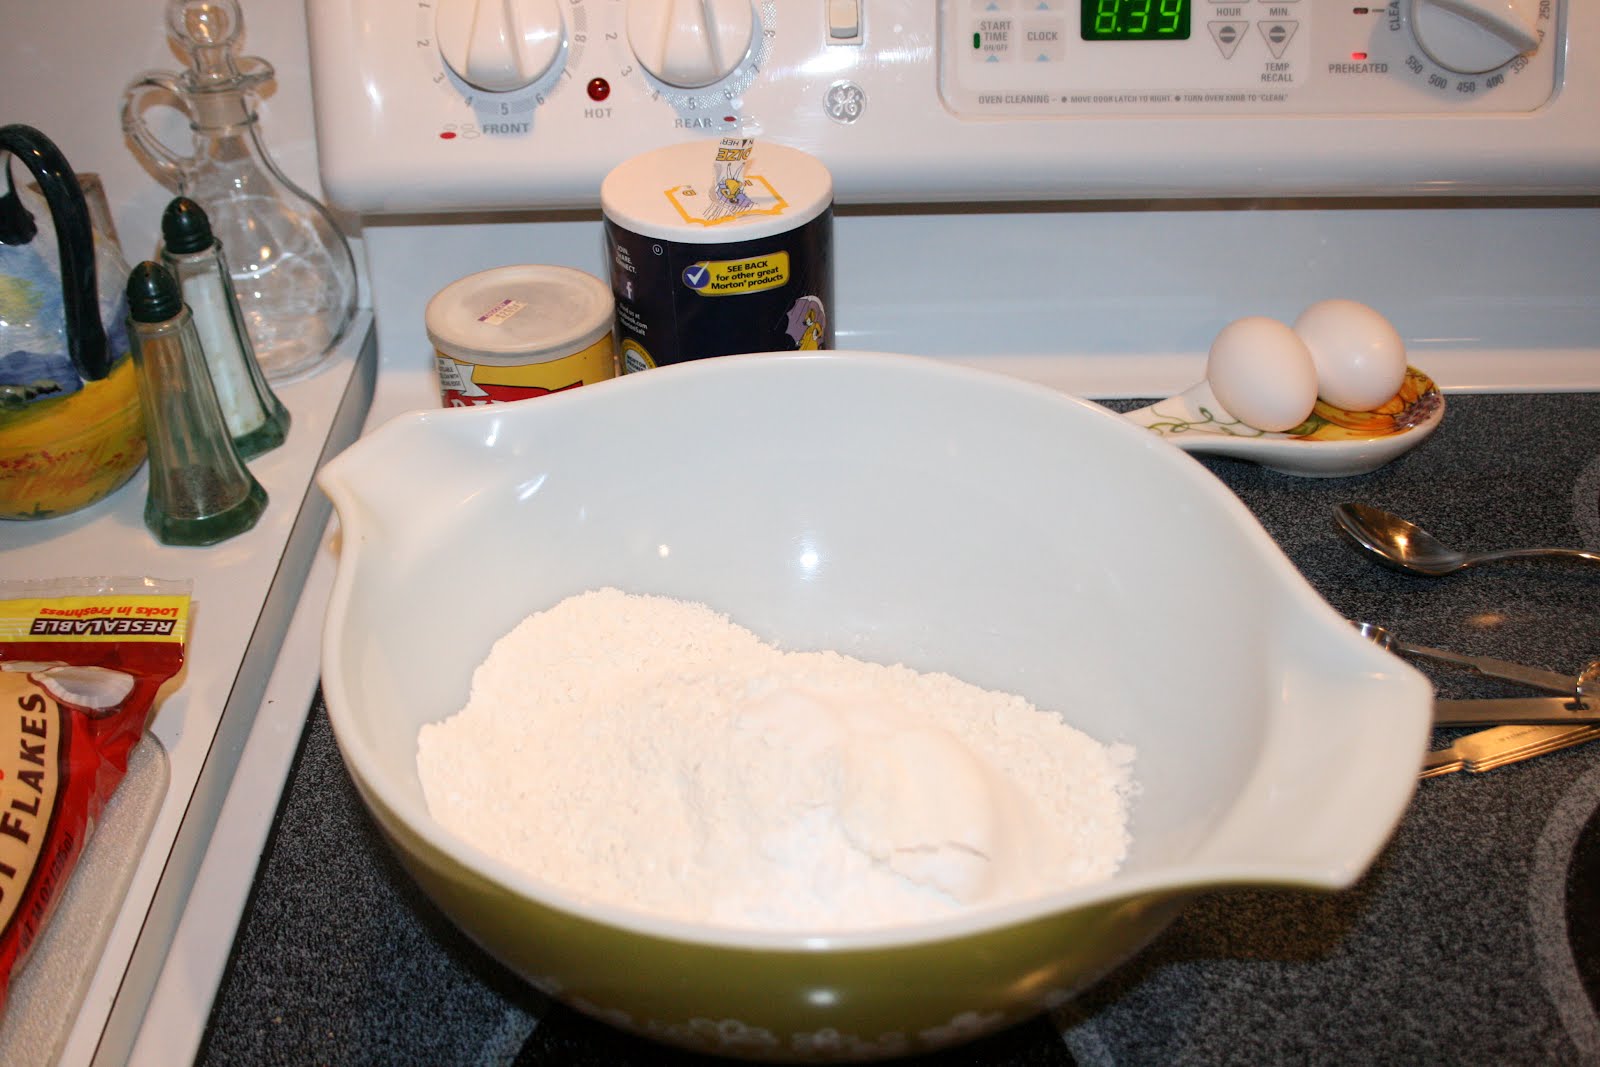

Beat the butter and shortening together until creamy. Add the sugar and vanilla and continue beating until fluffy. Add the eggs and beat until just combined. Add the bananas and beat until just combined. Then add the flour mixture, alternating with the buttermilk, in three additions, beginning and ending with the flour mixture.
Fill the cupcake tins about three-quarters full.
Bake for 20 to 25 minutes, rotating the pans halfway through the baking time, until a toothpick inserted in the center of a cupcake comes out clean. Transfer the pans to a wire rack and let cool for 20 minutes. Remove the cupcakes from the pans and place them on the rack to cool completely.
For the chocolate buttercream:
Mix 2 sticks of butter (room temperature), 1/2 cup of cocoa powder, 3 cups of powedered sugar, 2 teaspoons of vanilla extract, 1/2 teaspoon of salt, and 4 tablespoons of heavy cream or half and half until creamy and soft.
For the coconut:
Spread shredded coconut on a baking sheet and bake in the oven at 350 degrees for about 10 minutes, until browned. You may want to stir the coconut around once or twice during baking to make sure it browns evenly.
It will go from this:
To this:
Now, on to the decorating!
Spread each cupcake with icing.
Using your fingers, press coconut around the edge of the cupcake, leaving a space in the center clean. Place 2 or 3 candy eggs in the center.
So, so cute. And tasty. Success!

Passover Fresh Fruit Tart


Happy Pesach everybody!

About a week ago my bestie Ilene and I went to a "Passover Sides and Desserts" class at the Institute for Culinary Education here in NYC. We were both seeking inspiration for new dishes to bring to our respective Seders this year. During the 4+ hour class we made: chicken soup, herbed matzo balls, salmon gefilte fish, matzo polenta with mushrooms, Passover rolls, potato kugel, a chocolate torte, a strawberry hazelnut macaroon torte, and this lovely fresh fruit tart that I am sharing with you today.

Fresh fruit, tangy raspberry sauce, and an almost marzipan-ish cake... yum scrum

My original plan was to re-make it for my family's Seder on Friday, but the truth is the combination of a killer hangover (Thursday night was... uhm...epic) and a lack of faith in my ability to transport it safely up to Stamford, CT made that impossible. I did make it on Saturday though. And it was deeeelicious. It is kosher for Passover, but seriously its so good and so simple there's no need to limit it to those 8 days of the year. Besides, dessert is non-denominational.

Passover Fresh Fruit Tart

Ingredients for the Almond Cream Cake:
  • 1 cup blanched almonds
  • 1/2 cup sugar
  • 2 eggs
  • 1 stick butter, at room temperature
  • pinch kosher salt
For the toppings:
  • 10 oz frozen raspberries, thawed
  • fresh fruit and berries (I used banana, orange, raspberries and strawberries- you can also use pears, apples, etc.
  • 5 tablespoons lemon juice
  • 1/4 cup apricot preserves

Preheat oven to 375 degrees. Grease a 9 inch round cake pan and line with parchment paper; grease the parchment paper. Pulverize the almonds in a food processor, then add the sugar and process until combined. Add both eggs and process for one minute. Add the butter (cut into small pieces) and the salt and process for another minute (or until no chunks of butter are left). Place in the oven and bake for 20-25 minutes, until browned (in my experience this takes no longer than 20 minutes).


Cook in cake pan on wire rack for 20 minutes, then remove cake from pan and cool entirely.

In the meantime, wash and chop up your fruit. Berries and oranges can be placed directly in the refrigerator, while bananas/apples/pears should be tossed with 2 tablespoons of the lemon juice before they are put in the fridge to prevent browning.

Blend the thawed frozen raspberries in a blender until smooth, then strain the mixture to remove the seeds.


When the cake is fully cool, spoon the raspberry sauce over the cake (you may not need to use all of the sauce).


Arrange the fresh fruit on top.


In a small saucepan, melt the apricot preserves and 3 tablespoons lemon juice over low heat.


Using a pastry brush, gently brush the apricot preserves over the tart.


Serve with a little extra raspberry sauce for added flavor and prettyness.


Voila! Enjoy.

Sunday, March 11, 2012

Bailey's Black and White Cupcakes


Aside from openmindedness and appreciation of diversity and all that good stuff, one of the benefits of having parents from different cultural backgrounds is the number of holidays my family celebrates. And yes, I am indeed part Irish so unlike SOME of you green beer -swilling heathens out there I possess a legitimate right to celebrate St. Patrick's Day thankyouverymuch. (Fake snark alert: feel free to get down with your badass green beer -drinking self whenever your heart desires).


But let's be honest, for us St. Patrick's Day has nothing to do with culture or saints or snakes or Ireland and everything to do with family and food. Saturday night was our annual St. Patrick's day dinner, and as usual my aunt's corned beef and cabbage solidified her reputation as, like, the best cook EVER. Corned beef and cabbage is one of those meals that sounds disgusting and doesn't look or smell much better, but it tastes sogoodsosaltysomuchflavor and ugh vegetarianism be damned I have a weakness for it to the point where its not even funny. My aunt also makes an amazing irish soda bread with raisins that is dense and sweet and beyond fabulous, as well as great cole slaw and great potatoes and seriously everything she touches is usually delicious, so I was at a bit of a loss as to how I could possibly make a dessert that people would even want to LOOK at after that amazing dinner.


The answer? Alcohol. (As usual, amirite?). To be specific, Bailey's Irish Cream. Lots of it. Bailey's in the cupcake batter. Bailey's in the chocolate ganache. Bailey's in the buttercream frosting. Bailey's swigged straight from the bottle as I toiled in the kitchen...

Just kidding. That's gross. I used a glass.

The cupcakes were inspired by a recipe from Better Home & Gardens, but as I started making the batter I didn't like the results I was getting (too thick, not enough chocolate, etc.) so I tweaked the recipe as I went along, and improvised the frosting. The result was a moist and surprisingly light cupcake with deeeelicious frosting flavored with just enough Bailey's to make it interesting. The chocolate half of the cupcake could have used some more flavor so going forward I might substitute cocoa powder, but all in all the cupcakes were a crowd pleaser and I'll def be keeping one in the freezer to celebrate with on the REAL St. Paddy's day after I'm done taking the MPRE (come to think of it, the entire bottle of leftover Bailey's might come in handy as well).


Bailey's Black and White Cupcakes

Ingredients:
  • 1/2 cup butter, room temperature
  • 4 egg whites, room temperature
  • 2 cups all-purpose flour
  • 1 teaspoon baking powder
  • 1/2 teaspoon baking soda
  • 1/2 teaspoon salt
  • 1 3/4 cups sugar
  • 4 tablespoons Irish cream liqueur
  • 1 teaspoon vanilla
  • 1 1/4 cups buttermilk
  • 4 ounces bittersweet chocolate, melted
Preheat the oven to 350 degrees and place paper liners in 24 cupcake/muffin molds. In a medium mixing bowl mix the flour, baking soda, baking powder, and salt and set aside. In a large mixing bowl beat the butter until soft, adding the sugar, vanilla, and liqueur. Beat until combined, scraping down the sides of the bowl every once in awhile. Add egg whites one at a time, mixing well after each addition. Then alternate adding the buttermilk and flour mixture, mixing until just combined.


Why buttermilk? The acid in buttermilk reacts with baking soda to produce bubbles of carbon dioxide, hence why buttermilk is the preferred liquid of many cooks for making light, high-rising biscuits, scones, pancakes, etc. In this case it lends itself to a light cupcake with a very soft and fluffy crumb.

Pour half of the batter into a separate bowl and add the melted chocolate. Fill each cupcake mold about 2/3 of the way full, spooning chocolate batter into one side of the cup and white batter into the other.


Bake about 20 minutes or until the tops spring back when lightly touched. Cool in pans on wire racks for 5 minutes and then remove cupcakes and set on the racks to cool entirely.

Symmetry has never been my strong suit

For the Bailey's Ganache:
Bring 1/2 cup of whipping cream just to a boil. Remove from heat, add 6oz chopped bittersweet chocolate and let sit for 5 minutes.


Add 2 tbsp Bailey's and stir until smooth. Let sit for 15-20 minutes until somewhat thickened, and then smoosh about a tablespoons-worth onto the top of each cupcake, smearing it around a bit with the back of a spoon until relatively flat but not dripping over the side.


Let set (about 1 hour or 15 minutes in the fridge).


For the Bailey's Icing:
Mix 2 sticks butter (room temperature) with 2 1/2 cups powdered sugar until well blended. If you have a mixer, great. If not, this can be done by hand. Add in 3 healthy tablespoons of Bailey's and mix well. Spread onto the top of cupcakes with a knife or use a pastry bag with a wide tip.


For some extra flair, sprinkle with mini chocolate chips, crushed coffee beans, or green sugar crystals.


Enjoy!

Friday, March 2, 2012

Melting Snowman Cookies


Now is the winter of my discontent.* Mild temperatures are nice and all, but I want SNOW. I want sledding and snowmen and rosy cheeks and warm mugs of hot chocolate drunk slowly while reading the New York Times Style Section (don't judge) and watching the snow fall outside my window. Alas, it is not to be. And given that for the first time in recent history I've made it through the winter without losing a pair of boots to salt stains and water damage, I guess I should be thankful. But, well.... I'm not. I still want snow. Luckily these adorable melting snowman cookies take me back to the magical times of yesteryear aka last year when I knew what being cold felt like. I made them for a party and they were a HUGE success. And quite tasty, if I do say so myself.


Melting Snowman Cookies
Ingredients:
  • sugar cookie dough (use your favorite recipe)
  • marshmallows
  • royal icing (confectioners sugar, meringue powder, warm water)
  • food coloring or premade cookie icing
  • mini chocolate chips
Make a batch of sugar cookie dough using your favorite recipe. Shape balls of dough about the size of a small ice cream scoop into uneven, lumpy pancakes about half an inch thick. You want the dough to bake in the shape of a melted puddle, so the more uneven the better and no two cookies should be the same. Bake according to recipe directions, although you may need an extra minute or two because the cookies are rather large. Allow to cool.


Make the royal icing by beating 4 cups of confectioners sugar, 3 tablespoons meringue powder, and 6 tablespoons of warm water until stiff peaks form. This will take about 10 minutes. Transfer half of the icing into a bowl and add 1/2 teaspoon of water at a time until the icing get slightly runny.

Place a piece of tinfoil or parchment paper on a tray, and arrange the cookies on top. Spoon some of the runny royal icing onto each cookie and spread it around with the back of the spoon, allowing the icing to drip over the edge of the cookie.

Before the icing fully sets, grease a plate with butter or shortening. Place several marshmallows on the plate and microwave for approximately 20 seconds, stopping the microwave before the marshmallows double in size. With well-greased fingers to avoid stickiness, smoosh a marshmallow onto each cookie to make the "head." Repeat until each snowman has its own little mushy face.


Now comes the fun part- decorate however you wish! I used mini chocolate chips for buttons and then put food coloring in the remaining icing and piped scarves, bows and hats onto my snowmen. I used Wilton's cookie icing in orange and black for the faces and hands (if you do this, do NOT microwave the icing for the full time suggested on the bottle- it will be too runny. I had several deformed, sinister-looking snowmen as proof of that fact, but my family ate them before they could be photographed.)

*This reference is not as random as it may seem. I saw Richard III at BAM last week and it was AMAZING. A very long production (3.5 hours), but the actors were fantastic, the set production was striking, and I enjoyed every minute of it. Plus, Kevin Spacey is badass. Go see it if you have the chance!

Saturday, May 7, 2011

Peanut Butter Pretzel Truffles

This recipe is super yummy and super easy. It has only three ingredients: peanut butter, pretzels, and chocolate.


Peanut Butter Pretzel Truffles
Ingredients:
  • 1/2 cup natural peanut butter
  • 1/2 cup finely chopped salted pretzels
  • 1/2 cup melted chocolate chips (semi-sweet, dark chocolate, white chocolate.. up to you)
Mix the peanut butter and pretzels in a small bowl. Stick in the freezer for 15 minutes to set. Remove mix from freezer, form teaspoon-sized balls of mix and drop onto wax paper (should make about 10- 15 balls). Place in freezer for at least one hour until firm.

Now if you're like me, you're thinking 'Gross. Natural PB has no flavor and a weird texture!' Believe me, this recipe is the only reason I will ever willingly bring natural PB into the house. Reduced Fat Creamy Jif is my 6th food group. Seriously. But natural works better here because of that weird aka "natural" flavor and texture. Plus let's face it, the reason processed peanut butter tastes so good is because of all the added sugar- enter melted chocolate, stage right:

Melt chocolate chips. Roll peanut butter-pretzel balls in the chocolate, place back on wax paper, place in the refrigerator at least 30 minutes or until chocolate sets.


I'm going to find a fun way of packaging these guys and give them to minha mãe for Mother's Day. I already got her a jar of Sarabeth's Plum Cherry jam (she's obsessed), but I think she deserves a little more than that!


Muito fácil e muito delicioso! nom nom.


*UPDATE*: I went to the local chocolate shop and got a tin and some papers to put the truffles in. Only 8 fit in the tin, so the rest will be traveling in the ever-classy tupperware:

Monday, May 2, 2011

Birthday Brownies!

Huzzah! Today is my darling roommate and dear friend Akshaya's birthday! Unfortunately we are in the midst of final exams so the festivities will have to wait until next week. However, in honor of the day of her birth I am making some brownies.

The recipe is one I got from my mother, who probably got it from her mother. These brownies were a staple growing up in my house. My parents have a home video of me at approximately 4 years old making them with my dad. After we stick the pan in the oven he asks if I want to "lick the bowl," at which point I literally pick up the mixing bowl, stick my head into it, and start licking.

These days I use a spoon, but the enthusiasm is the same.

Mom's Brownies

Ingredients:
  • 1/3 cup butter (melted)
  • 1 cup sugar
  • 2 eggs (room temperature)
  • 2 envelopes ChocoBake (this can be hard to find, so if you don't have it, substitute with 6 tablespoons cocoa powder and 1 tablespoon vegetable oil)
  • 2/3 cup flour
  • 1/2 tsp baking powder
  • 1/4 tsp salt
  • 1 tsp vanilla extract
Preheat oven to 350 degrees.
Thoroughly mix together the butter and sugar. Most baking recipes call for the ingredients to be at room temperature, but you really want the butter melted here to avoid clumping. Add eggs one at a time, then add Chocobake. Set aside.
In a smaller bowl, sift together flour, baking powder, and salt. Gradually add flour mixture to the sugar and eggs, stirring until totally combined.
Add vanilla extract, stir again.
Bake in a greased 9x9 inch baking pan for 30 minutes or until a toothpick stuck into them comes out clean.

These are in the oven right now and they. smell. so. good.
I'll be back later a picture of the final product!